- 默认使用官方安装程序,不满足安装程序内存要求时,将使用官方云镜像 (Cloud Image)
- 不含第三方链接和自制包,所有资源均实时从源站点获得
- 适配 512M + 5G 小鸡,并支持 256M 小鸡安装 Alpine
- 支持用官方 iso 安装 Windows (不支持 ARM)
- 支持 Windows 重装成 Linux,也可重装 Windows
- 支持 BIOS、EFI、ARM (ARM 不支持安装 Windows)
- 原系统分区支持 LVM、Btrfs
- 支持安装 Alpine、Arch、openSUSE、Gentoo,也可从这些系统安装
- 可通过 SSH、浏览器、串行控制台、后台 VNC 查看 DD、云镜像安装进度
- 有很多注释
Linux 下使用
下载
curl -O https://xikuqi.com/f/reinstall/reinstall.sh
用法 1: 安装 Linux
注意:静态 IP 的机器安装 centos、alma、rocky、fedora、debian、ubuntu,需添加参数 –ci 强制使用云镜像
bash reinstall.sh centos   7|8|9  (8|9 为 stream 版本)
                  alma     8|9
                  rocky    8|9
                  fedora   37|38
                  debian   10|11|12
                  ubuntu   20.04|22.04
                  alpine   3.16|3.17|3.18
                  opensuse 15.4|15.5|tumbleweed (只支持云镜像)
                  arch     (只支持 amd64 云镜像)
                  gentoo   (只支持 amd64 云镜像)

                  不输入版本号,则安装最新版

可选参数:         --ci     强制使用云镜像
用法 2: DD
支持 gzip、xz 格式
支持自动配置静态 IP、扩展系统盘
bash reinstall.sh dd --img=https://example.com/xxx.xz
用法 3:重启到 Alpine 救援系统 (Live OS)
可用 ssh 连接,进行手动 DD、修改分区、手动安装 Arch Linux 等操作
bash reinstall.sh alpine --hold=1
用法 4:重启到 netboot.xyz
bash reinstall.sh netboot.xyz
用法 5: 安装 Windows ISO
bash reinstall.sh windows \
     --iso='https://file.yinhanghao.com/d/web/zh-cn_windows_11_business_editions_version_23h2_updated_dec_2023_x64_dvd_9a37d106.iso' \
     --image-name='Windows 11 Pro for Workstations'
bash reinstall.sh windows \
     --iso='https://file.yinhanghao.com/d/web/zh-cn_windows_10_business_editions_version_22h2_updated_dec_2023_x64_dvd_f23f78f9.iso' \
     --image-name='Windows 10 Pro for Workstations'
bash reinstall.sh windows \
     --iso='https://file.yinhanghao.com/d/web/cn_windows_8.1_enterprise_with_update_x64_dvd_6050374.iso' \
     --image-name='Windows 8.1 Enterprise'
bash reinstall.sh windows \
     --iso='https://file.yinhanghao.com/d/web/cn_windows_7_ultimate_with_sp1_x64_dvd_u_677408.iso' \
     --image-name='Windows 7 ULTIMATE'
bash reinstall.sh windows \
     --iso='https://file.yinhanghao.com/d/web/zh-cn_windows_10_enterprise_ltsc_2021_x64_dvd_033b7312.iso' \
     --image-name='Windows 10 Enterprise LTSC 2021'
bash reinstall.sh windows \
     --iso='https://file.yinhanghao.com/d/web/zh-cn_windows_server_2022_updated_dec_2023_x64_dvd_f101ef8f.iso' \
     --image-name='Windows Server 2022 SERVERDATACENTER'
bash reinstall.sh windows \
     --iso='https://file.yinhanghao.com/d/web/cn_windows_server_2019_x64_dvd_4de40f33.iso' \
     --image-name='Windows Server 2019 SERVERDATACENTER'
bash reinstall.sh windows \
     --iso='https://file.yinhanghao.com/d/web/cn_windows_server_2016_x64_dvd_9327743.iso' \
     --image-name='Windows Server 2016 SERVERDATACENTER'
bash reinstall.sh windows \
     --iso='https://file.yinhanghao.com/d/web/cn_windows_server_2012_r2_with_update_x64_dvd_6052725.iso' \
     --image-name='Windows Server 2012 R2 SERVERDATACENTER'
bash reinstall.sh windows \
     --iso='https://file.yinhanghao.com/d/web/en-us_windows_10_iot_enterprise_ltsc_2021_x64_dvd_257ad90f.iso' \
     --image-name='Windows 10 IoT Enterprise LTSC 2021'
参数说明
--iso 原版镜像链接,无需集成 VirtIO、Xen、AWS、GCP 驱动
--image-name 指定要安装的映像,不区分大小写,两边要有引号,例如:
'Windows 7 Ultimate'
'Windows 10 Enterprise LTSC 2021'
'Windows 11 Pro'
'Windows Server 2022 SERVERDATACENTER'
使用 Dism++ 文件菜单 > 打开映像文件,选择要安装的 iso,可以得到映像名称

其它说明
-
测试成功的系统有 7 10 11 2022,测试平台为 vultr (bios)、甲骨文 (efi)、aws t2 (xen)、aws t3 (nitro)
-
支持 32/64 位系统,UEFI 机器只支持 64 位
-
可绕过 Windows 11 硬件限制
-
实测不支持 ARM
-
zh-cn_windows_10_enterprise_ltsc_2021_x64_dvd_033b7312.iso此镜像安装后wsappx进程会长期占用 CPU这是镜像的问题,解决方法是安装
VCLibs库 -
以下网站可找到 iso 链接
Windows 下使用
管理员权限运行 cmd
如果运行的是 powershell,先进入 cmd
下载
certutil -urlcache -f -split https://xikuqi.com/f/reinstall/reinstall.bat
如果无法下载
-
关闭 Windows Defender 实时保护
-
更新 SSL 根证书
certutil -generateSSTFromWU root.sst
certutil -addstore Root root.sst
-
链接另存为、远程桌面复制以下两个文件https://xikuqi.com/f/reinstall/reinstall.bat
https://xikuqi.com/f/reinstall/reinstall.sh
所有功能均可在 Windows 下使用,参数和 Linux 下使用一样
以安装 centos 7 为例
reinstall.bat centos-7
安装 Windows ISO
reinstall.bat windows --iso='https://file.yinhanghao.com/d/web/zh-cn_windows_10_enterprise_ltsc_2021_x64_dvd_033b7312.iso' --image-name='Windows 10 Enterprise LTSC 2021'
内存要求
| 系统 | 传统安装 | 云镜像 |
|---|---|---|
| Debian | 384M | 512M |
| Ubuntu | 1G | 512M |
| CentOS / Alma / Rocky / Fedora | 1G | 512M |
| Alpine | 256M | – |
| openSUSE | – | 512M |
| Arch | – | 512M |
| Gentoo | – | 512M |
| Windows | 1G | – |
网络要求
用安装模式安装 Linux 要有 DHCPv4
其他情况支持静态 IP、IPv6(包括安装 Alpine、云镜像、Windows iso、dd)
运行脚本时不需要填写静态 IP 地址
虚拟化要求
不支持 OpenVZ、LXC 虚拟机
请使用OpenVZ/LXC 网络重装-稀酷奇 (xikuqi.com)
默认密码
| 系统 | 用户名 | 密码 |
|---|---|---|
| Linux | root | 123@@@ |
| Windows (iso 安装) | administrator | 123@@@ |
TODO
- 安装模式:静态 IP、IPv6、多网卡
移动云电脑安装实例
第零步,备份网卡信息
- 备份网卡ip以及网关等信息

第一步,关闭自带一切防护软件
- 打开系统设置

- 跳转病毒防护
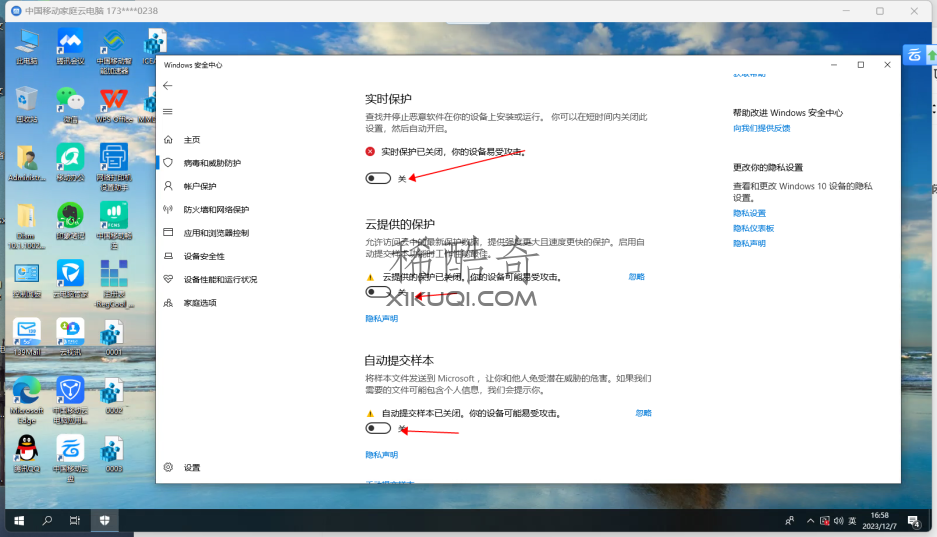
- 关闭防护
第二步,下载重置脚本 reinstall.bat 和 reinstall.sh
- 下载好两个文件记得放桌面,如果不能下载记得修改 cloudTools 为 cloudTools
https://xikuqi.com/cloud/reinstall/reinstall.sh
https://xikuqi.com/cloud/reinstall/reinstall.bat

或者:
https://github.com/transnull/reinstall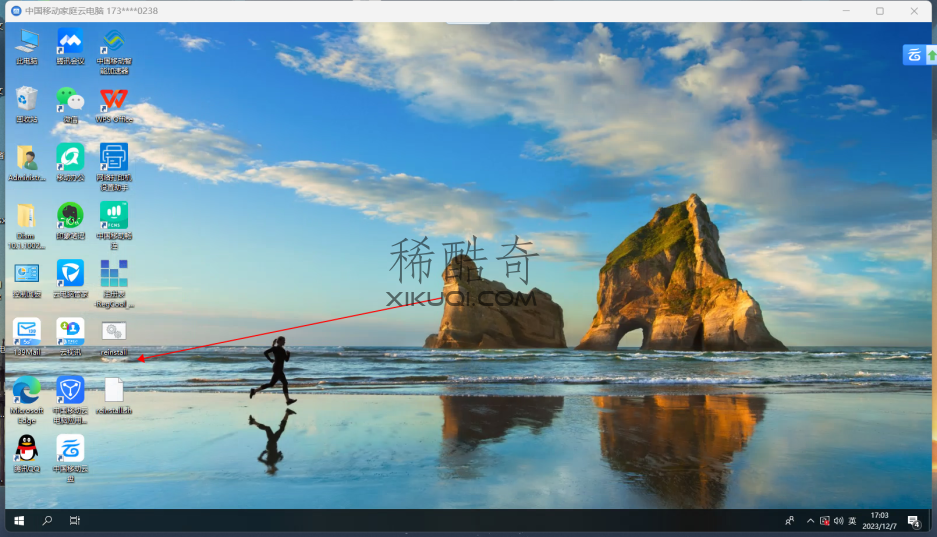
第三步,打开 Powershell 执行命令完成重装
- 管理员模式打开 Powershell

- 切换到桌面
cd .\Desktop\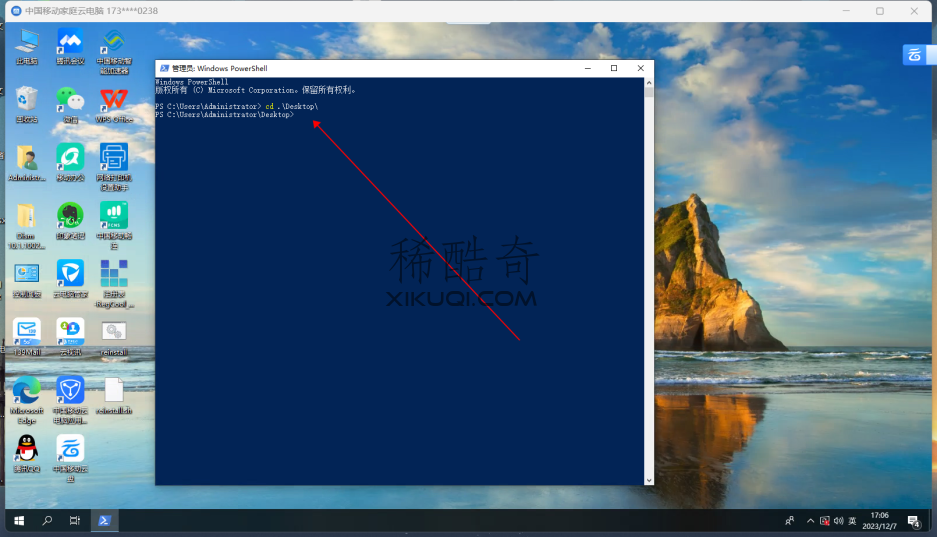
- 执行命令重装
.\reinstall.bat dd --img=https://pan.transnull.cn/d/Mirrors/winsrv2022-lite.vhd.gz